Project Settings
To access the settings for any project, click Settings in the top right corner of a Project Grid page. The Settings page contains 4 tabs that display various configuration options:
Basic Settings
Processing Options
Customize LexNLP
Processing Status
Below is a detailed guide to the configurable options on each tab.
Basic Settings
The “Basic Settings” page displays the following information:
Project Name: You can change the name of the project in this form, then click “Save” in the top right to save changes
Type: The Document Type for this project (Cannot be changed)
“Hide Clause Review” checkbox: This box is checked by default. Uncheck this box to toggle the Clause Review tab for this project. (see the Clause Review page for more)
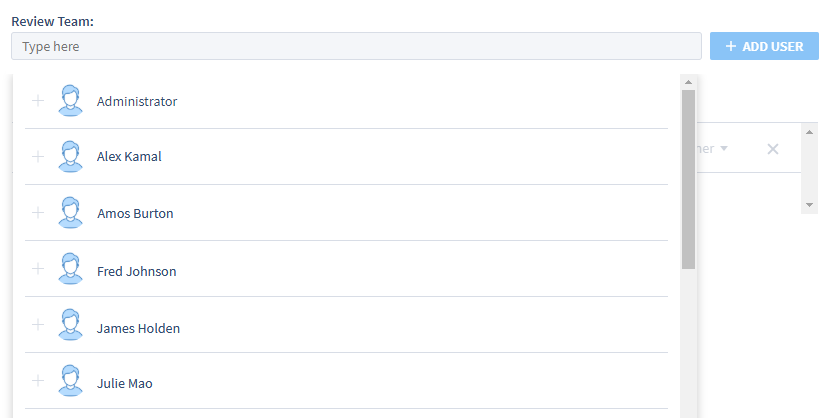
Review Team: At the top of the Review Team section, there is an Add User form. Click the form for a drop-down list of all users who have access to this ContraxSuite instance, listed in alphabetical order by first name (see below). Below this form is a list of users already assigned to the project, with their permission level accessible via a drop-down to the right of the name (Admins and Project Owners can change a user’s permissions).
Junior Reviewer: Can only see and edit documents assigned to them. They cannot delete the project or the documents in it, add users or documents to the project, or perform bulk assignment or status changes.
Reviewer: Has all the same access as Junior Reviewer, and can additionally see and edit all documents in the project, regardless of assignment.
Reviewer Upload and Manage: Has all the same access as a Reviewer, and can additionally upload documents and perform bulk assignment and status changes.
Project Owner: Has all the same access as Reviewer Upload and Manage, and can additionally delete the project, delete documents from the project, and add users to the project.
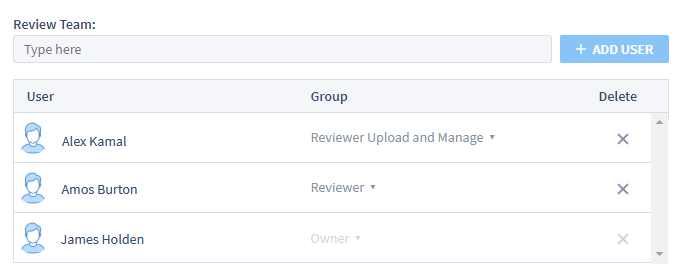
The users you’ve selected to add to the project will be listed in the search bar. Once you’ve selected all users you want to add to the project, click the + Add User button. The new users will now be displayed in the “Review Team” list, with their permission level (e.g., “Owner”, “Reviewer Upload and Manage”, “Reviewer”, or “Junior Reviewer”) listed next to their name.
If you have administrator privileges, you can change the permission level of individuals in a project to expand or contract their permissions (e.g., Reviewers cannot add Document Types or Fields; if you wanted to give a reviewer the permission to create Document Types or Fields, you would need to upgrade their rank here).
For more on user permissions, jump to the User Groups page.
The project’s Review Team is also configurable on this page. Visit the “User Groups” page for detailed instructions on setting up user accounts, system-level permissions, and adjusting permissions at the project level.
Processing Options
The “Processing Options” page displays the following information:
“Run OCR on New Documents” checkbox: This box is checked by default. If the documents in a project have already been processed by OCR (Optical Character Recognition), you may uncheck this box. (Keeping this box checked is recommended).
Detect Field Values: These settings allow you to re-detect Field Values for this project. See below for details.
“Document Transformer to apply” and “Text Unit Transformer to apply”: These settings can be used to create similarity objects/Conceptual Search results out of documents and/or text units in those documents. See below for details.
Detect Field Values
Users often create Document Types, Fields, and Field Detectors, then create a project, and then upload documents to that project, only to discover later that they need to make changes to their Fields and/or Field Detectors.
ContraxSuite parses uploaded documents, then runs Field Detectors to extract data and populate the data in the Grid Views and Annotator. If you make changes to any Fields and/or Field Detectors, re-running Field Detectors will allow you to see the effects of those changes. Follow the steps below to manually Detect Field Values for a project.
1. In the Settings menu, go to the “Processing Options” tab. Under “Detect Field Values”, select whether to re-run Field Detectors on the Whole Project, or whether to select specific documents to re-run Field Detectors on.
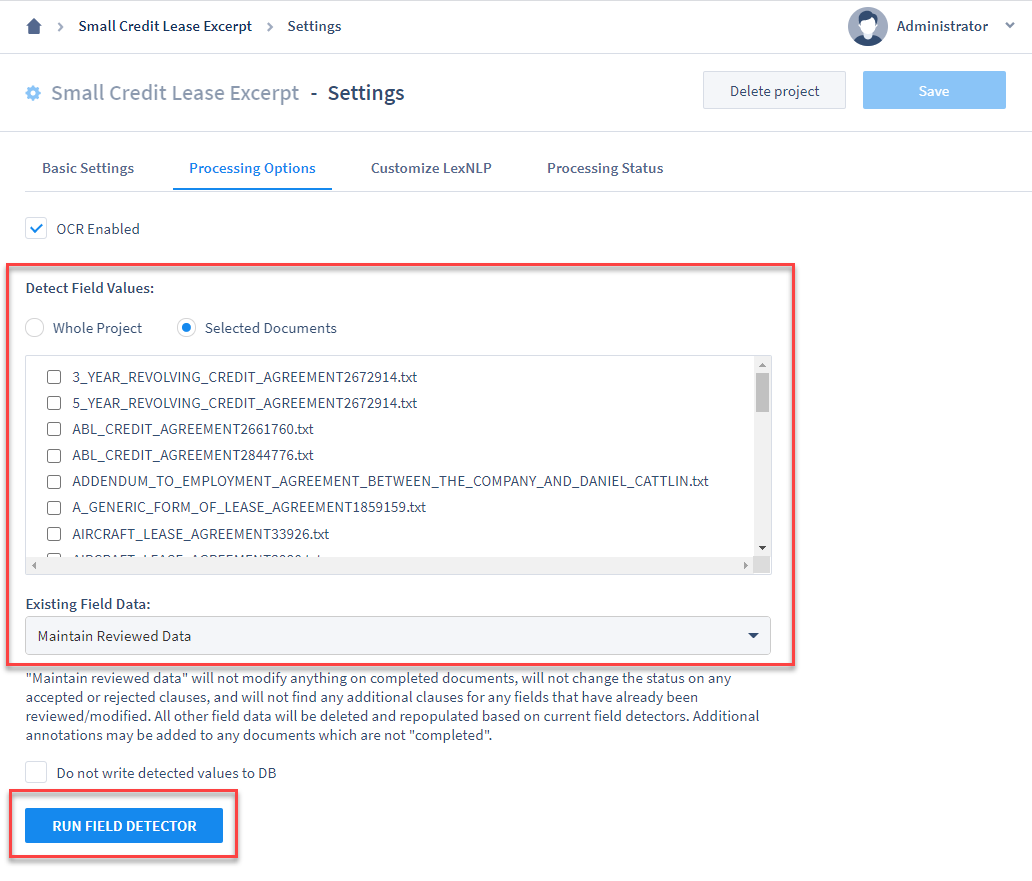
You will also need to specify what to do with the Existing Field Data already present in the system. There are two options for this:
Maintain Reviewed Data: Projects and documents marked “Completed” or “Excluded”, and any Field Data that has been modifed by users, will not be altered.
Delete all field data from project and run fresh extraction: Excluding projects and documents marked “Completed” or “Excluded”, all Field Data will be erased and Fields will be re-populated according to the parameters of the current Fields and Field Detectors.
There is also a checkbox labeled Do not write detected values to DB. Checking this box means that the task will not write any extracted values to the database. Recommended for testing purposes only.
2. Click the Run Field Detector button once you have selected parameters. A message will appear next to “Detect Field Values:” that displays the progress of the detection task.
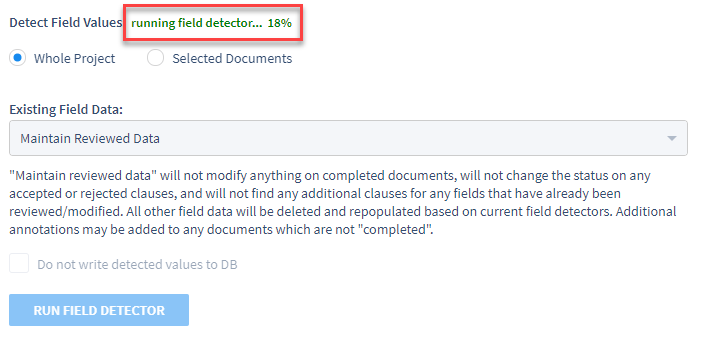
3. When the detection task has reached 100%, Field Detection has finished and you’ll be able to see updated results in the project’s Grid and Annotator.
Document and Text Unit Transformers
On the “Processing Options” tab, you can run Document and/or Text Unit Transformers. Transformers are a method of pre-processing the language of your documents so that Similarity Tasks and Conceptual Search can be performed.
Running Transformers on the documents or text units within a project allows them to be compared to one another later based on a percentage “score” of their similarity (see below). There are several configuration options for these Document and Text Unit Transformers:
The drop-down menu underneath “Document Transformer to apply:” and “Text Unit Transformer to apply:” will display a list of Transformer options to choose from:
“Document default transformer (en)” and “Text unit default transformer (en)”: Default
Term Frequency: This Transformer will pre-process documents and text units based on the Term Sets configured for this project
Any additional Transformers created and uploaded by a Technical Admin
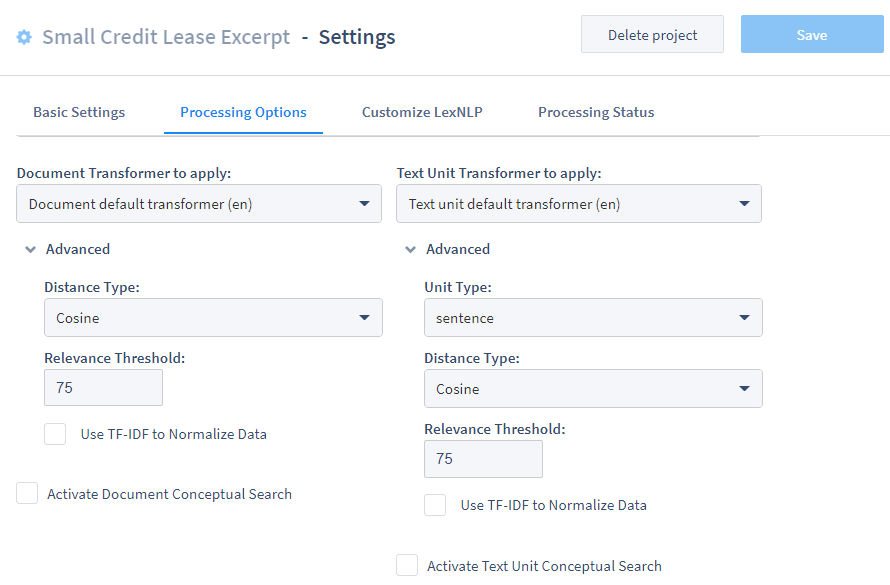
In the collapsible Advanced panel:
Distance Type: There are many different “Distance Types” that can be used to calibrate Document and Text Unit Transformers. “Cosine” is selected by default and is recommended.
Relevance Threshold: When Similarity Tasks are run, the Relevance Threshold determines how accurate the results need to be before they are shown to the user. The Relevance Threshold represents a percentage threshold of similarity that will be displayed. It is recommended that “Relevance Threshold” be left at 75, but this number can be set between 75 and 99.
Use TF-IDF to Normalize Data: Check this box to use TF-IDF to normalize the data that is returned by the Transformer.
Similarity Tasks and Conceptual Search
After running Document- or Text Unit-Level Transformers, there is a checkbox at the bottom of the “Processing Options” page to “Activate Document/Text Unit Conceptual Search”. Check the box that says “Activate [Document/Text Unit] Conceptual Search” to run Similarity Tasks and allow you to perform Conceptual Search in your project.
1. Clicking either the “Activate Document Conceptual Search” or “Activate Text Unit Conceptual Search” will begin the Similarity Task, and display a green “searching…” message:

2. Once the Similarity Task(s) is complete, you can run Conceptual Search in your project and see the results in the following ways:
Document Similarity: Go to the Grid View for this project, and right-click a document title and select “Find Documents Like This” from the right-click menu.
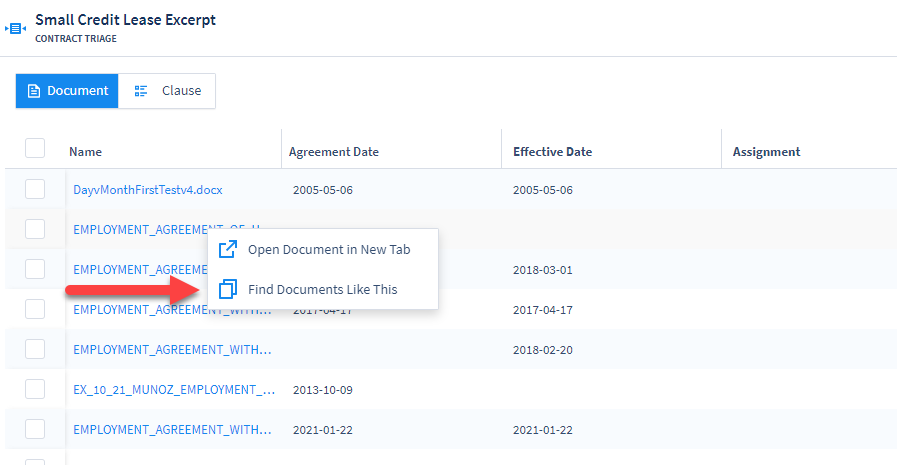
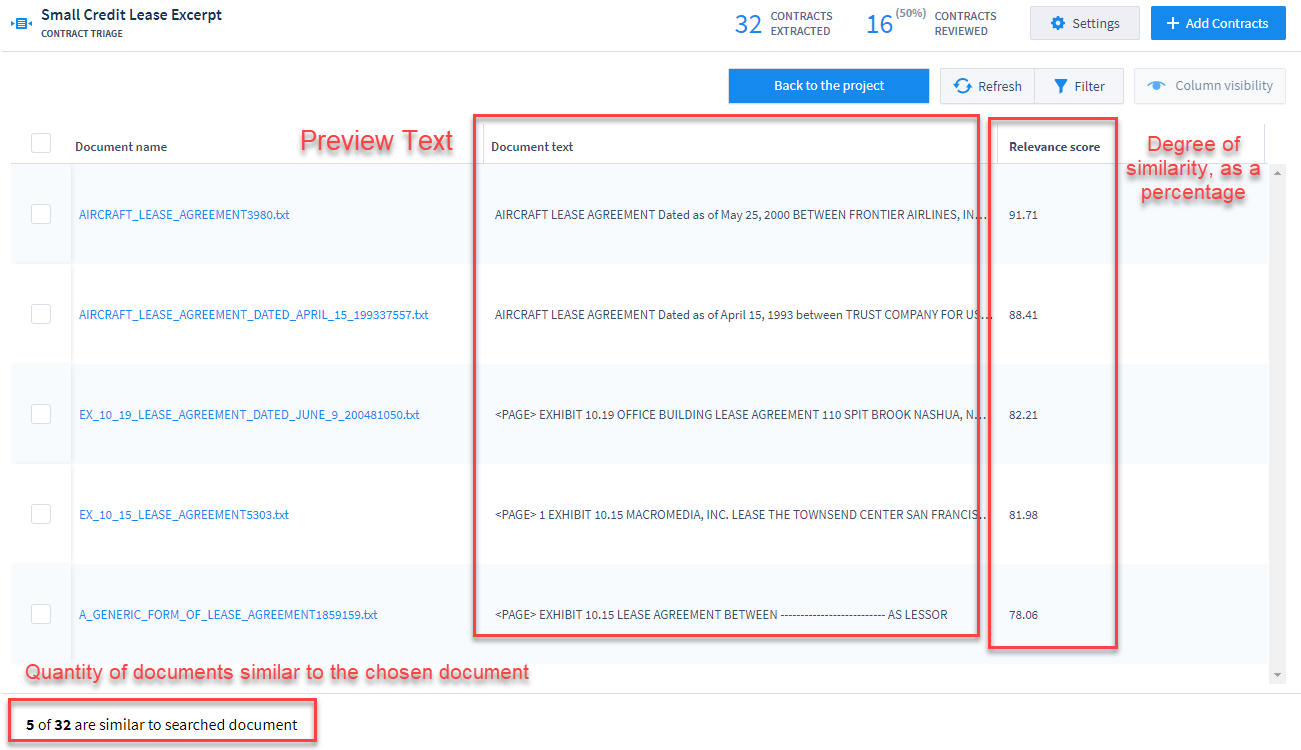
Clicking “Find Documents Like This” redirects screen to a Document Similarity Grid.
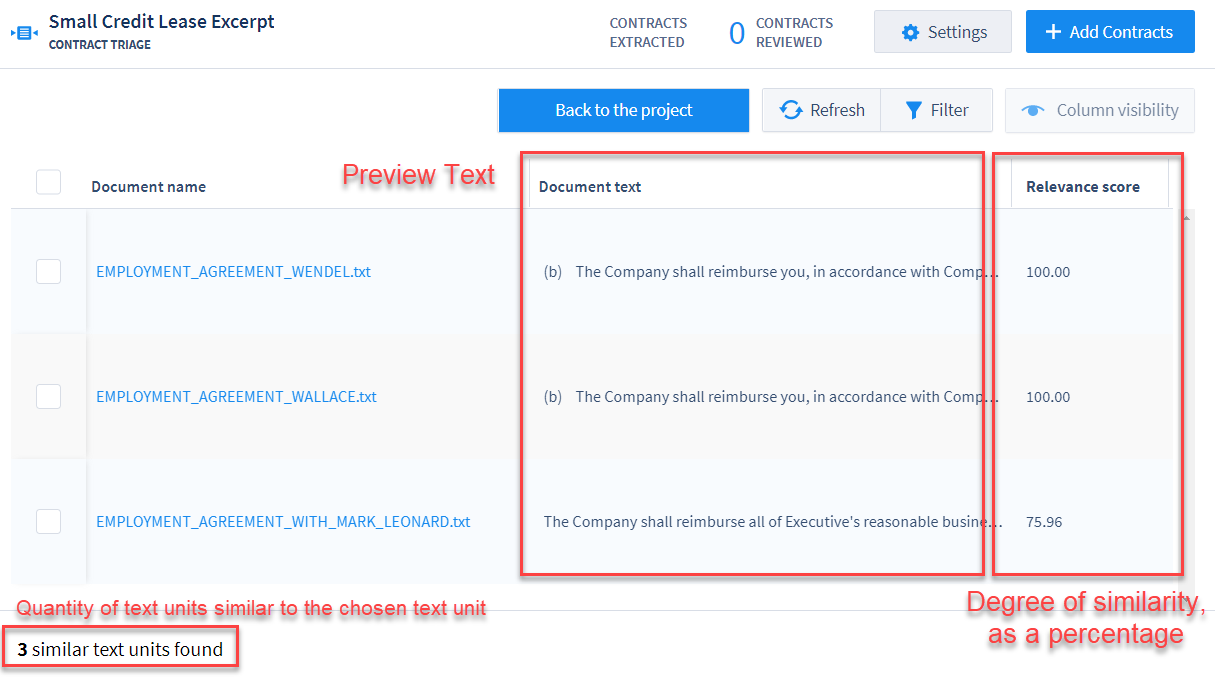
Text Unit Similarity: Open a document in the Annotator, highlight a text unit, right-click the text unit, and select “Find Text Like This” from the right-click menu.
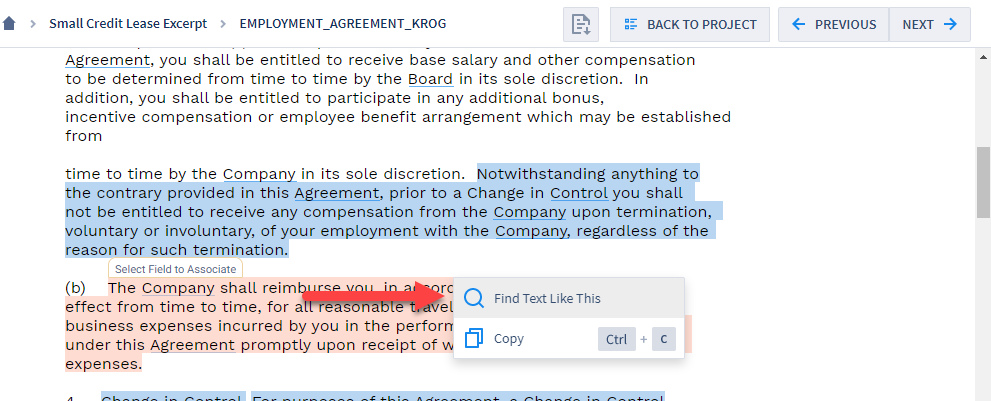
Clicking “Find Text Like This” redirects screen to a Text Unit Similarity Grid.
Note: Creating Document and Text Unit Similarity Objects can take a few minutes, or up to several hours, depending on the size and quantity of documents in a project. These tasks may also be limited in order to avoid database overload. Limits can be accessed and modified by administrators only.
Customize LexNLP
LexNLP can extract a wide range of standard legal terms and company types. LexNLP’s standard dictionaries can be augmented by the addition of custom Term Sets and custom Company Types. Administrators can add custom dictionaries and company types via the admin interface by uploading .csv files of lists of those terms and company types (Click here for additional instruction on uploading custom Term Sets and Company Types lists.)
On the Customize LexNLP tab on the “Settings” page, you can uncheck the boxes that read “Use Default Term Set” or “Use Default Company Types” to see a list of uploaded Term Sets and Company Type Sets that are available for the project.
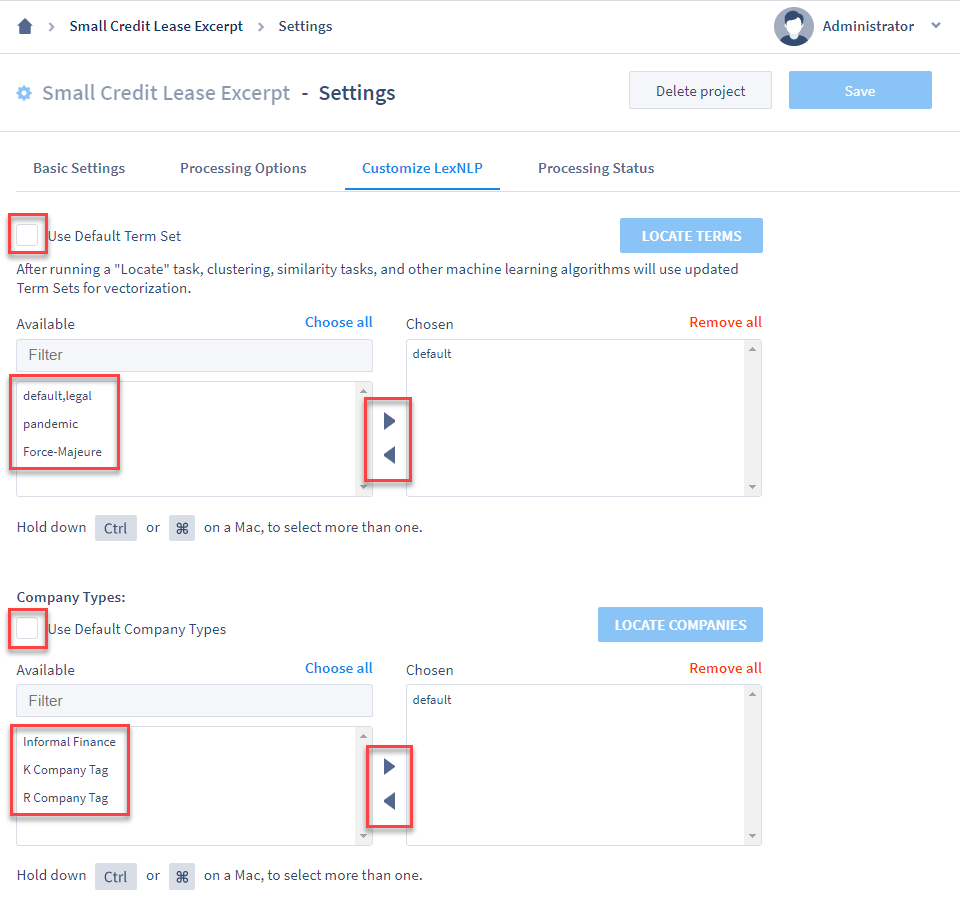
Use the form and the selection arrows to choose which Term Sets and Company Type Sets to use. After moving your selected Term Sets and Company Type Sets into the right side of the selection form, click “Locate Terms” and/or “Locate Companies”. Note that this task may take some time, depending on how large the Term Sets/Company Type Sets are. Processing time will also vary based on the size and quantity of documents in the project.
You can view the progress for this task, as well as for many other project-level tasks, on the “Processing Status” tab.
Processing Status
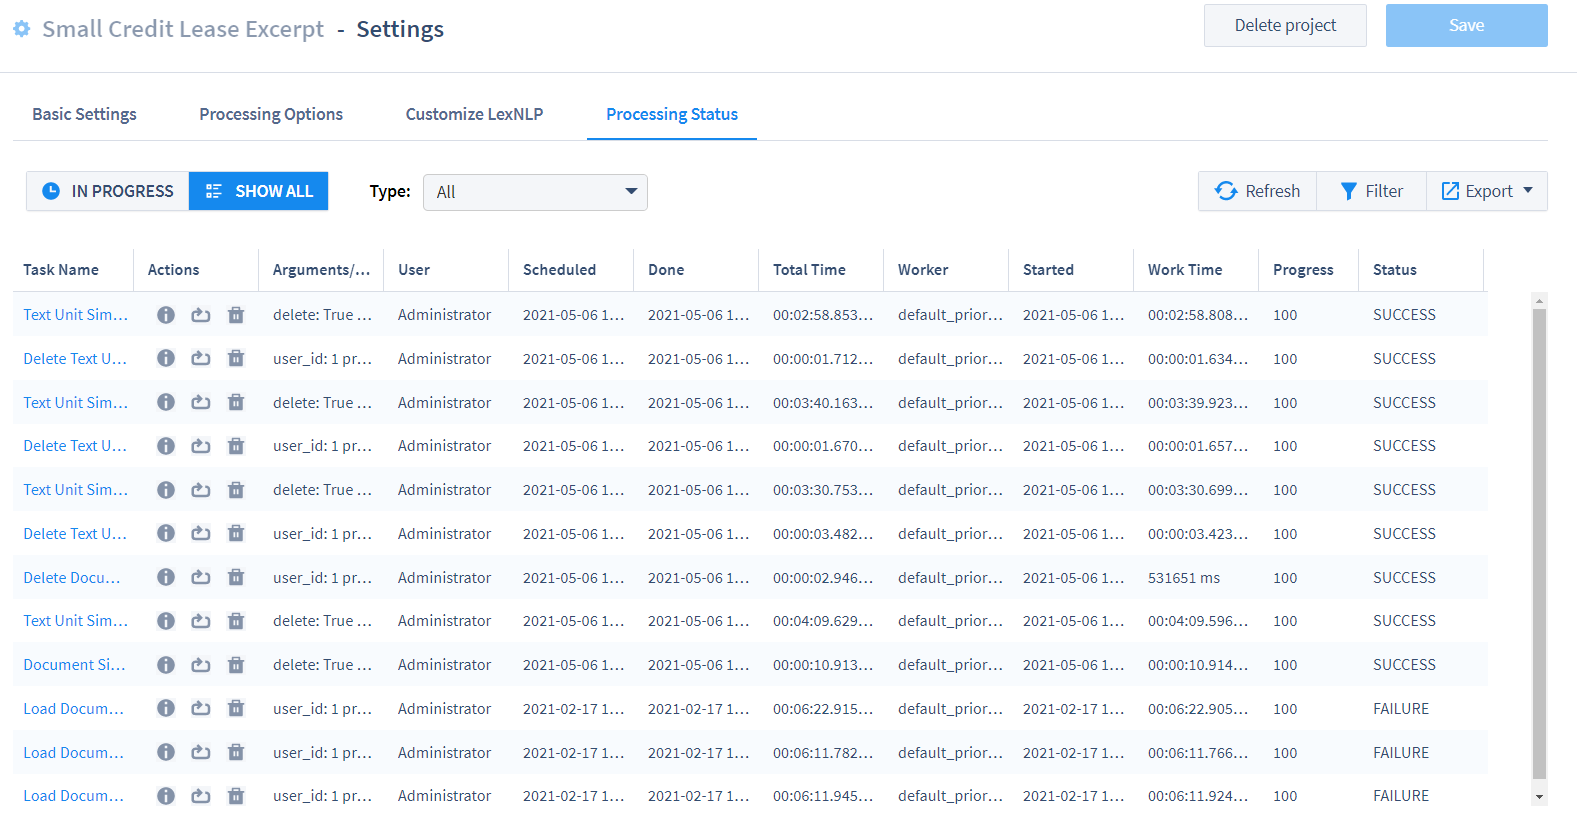
All tasks related to this project can be seen in the configurable Status Grid on the “Processing Status” tab.
The toggle in the top left lets the user see all tasks run for this project, or only those tasks that are “In Progress”:
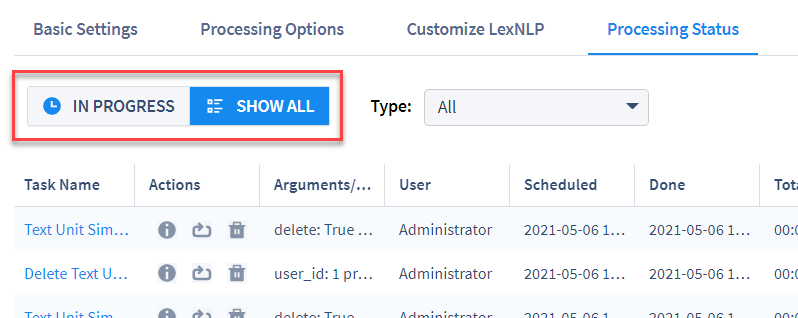
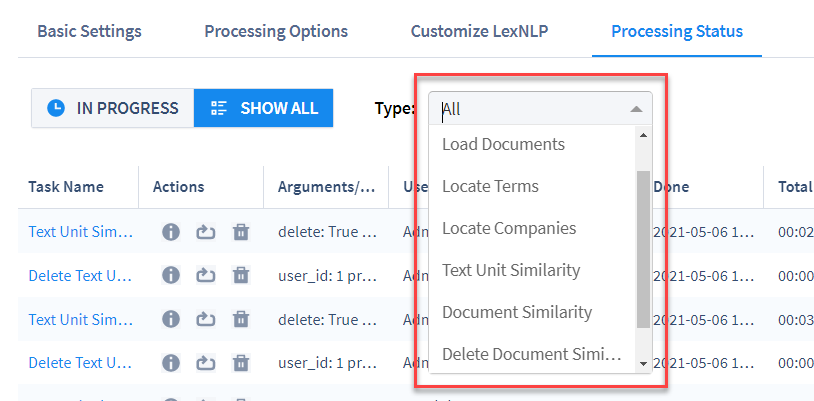
Next to this toggle is a drop-down list of the different types of tasks available in a project. This drop-down can be used to filter the Status Grid to only show tasks of a certain type (e.g., showing all “Load Documents” tasks):
In the upper right of the Status Grid, there are options to Refresh, Filter, or Export data from the grid:
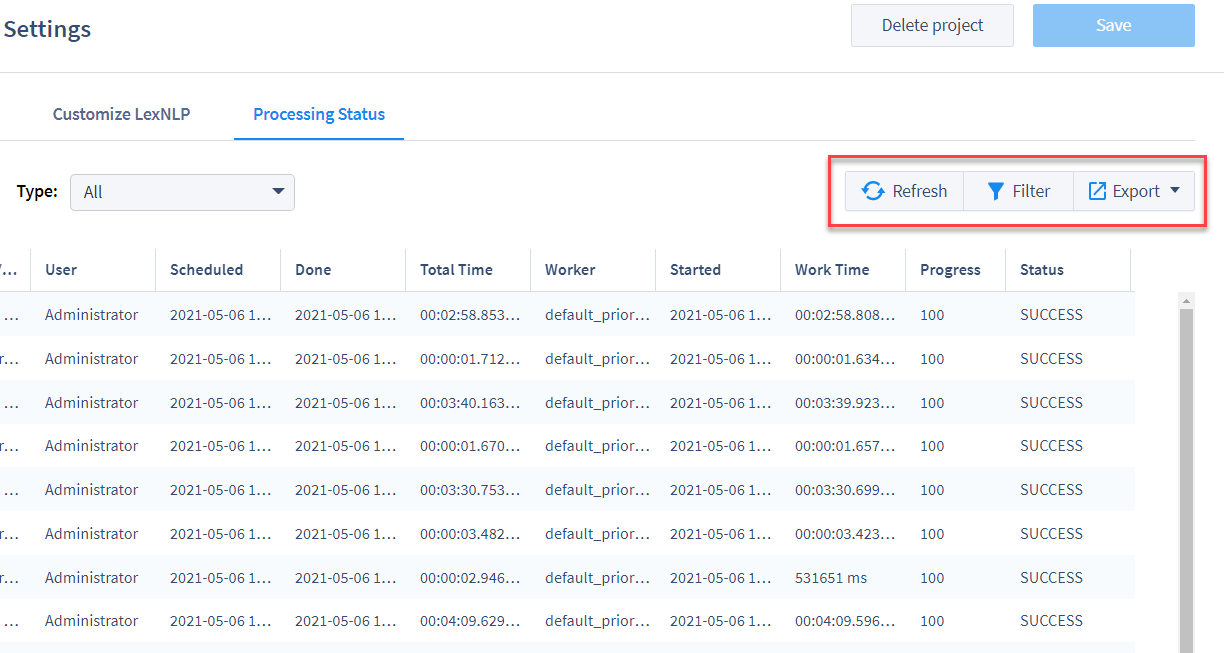
Refresh: Clicking “Refresh” will update the Status Grid, and any new tasks will appear.
Filter: This option allows you to filter the Status Grid based on individual values in the columns. For example, typing “Success” or “Failure” in the “Status” column will show only those tasks that have succeeded, or failed, respectively.
Export: You can export a spreadsheet of all the data contained in the Status Grid, based on which Filters you’ve chosen to display. There are 2 export options:
Microsoft Excel 2007-2013 XML (.xslx)
Text CSV (.csv)
In the “Actions” column, next to the “Task Name” column on the Status Grid, there are 3 icons available for every task:
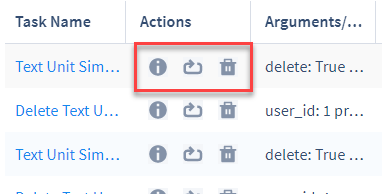
Task info: Clicking this button will redirect you to a page displaying a full line-by-line code output for this task. This can be especially useful when troubleshooting problems with your ContraxSuite instance.
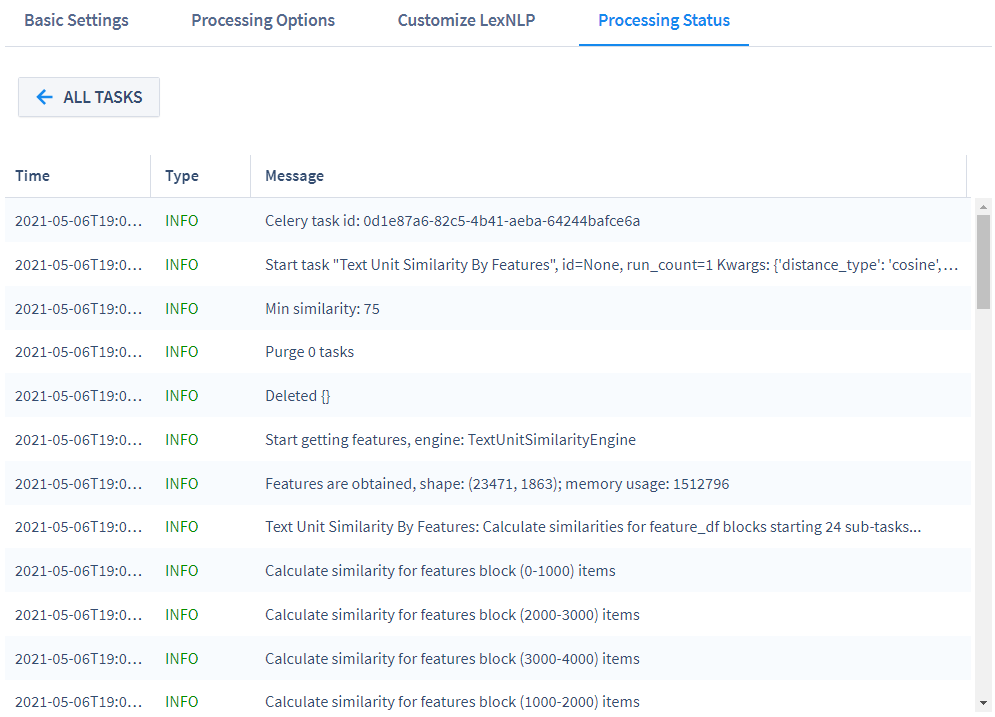
When on the Task Info page, click the “All Tasks” button at the top left to return to the Status Grid.
Restart task: Click this button to restart the task for this row. A pop-up will appear asking you to confirm that you want to restart the task. If you click “Continue”, the task will begin again at “0%” progress and will appear at the top the Status Grid (after clicking “Refresh”).
Purge task: If you click the trash can icon to the right of a Task Name, that task will be purged and cancelled. Successfully purging a task will remove it from the Status Grid. Recommended for any task that has not achieved any progress for 2-3 hours.